Sunday, December 1, 2013

Easy Recipe for Salt Dough Ornaments


As a kid, we had a wonderful Christmas tree.  Each year, my father would cut a fresh tree from our property and bring it into the house. The tree was draped in colorful lights, packages of silver tinsel, and a combination of decades of handmade ornaments.  With the oddball assortment of macaroni-framed pictures, paper chains, or walnuts housing baby Jesus (labeled Christmas in a nutshell), the tree was more quirky than Department-store beautiful.  In other words, it was perfect.

We would swarm around our parents who kept guard over the ornaments.  We each had a favorite, and it was important to find it before another sibling could hang it on the tree.

My sister would look for the "Harold Angel" ornament.  This was a stuffed fabric ornament of an angel cat from one of those pre-printed fabric panels sold in the early 1980's.  The ornament was not much to look at -- but it came with a story.  You see, we had a big, grumpy cat named Harold.  He was anything but angelic.  The idea of him with a halo and angel wings made us all laugh.  Once my sister found the ornament, she'd break into song:  "Hark the Harold angels sing..."

My favorite was made by my father.  When I was in elementary school we had a family activity of making Christmas ornaments from salt dough.  My dad made an ornament of my mother holding me while I was holding my doll.  My mother's hair was made from dough pushed through a garlic press. The homemade ornament lasted for several decades until the fragile spaghetti-like hair started to break.  Split ends were disastrous!

Over this Thanksgiving, I sat down with my kids and we made salt dough ornaments together for the first time.  Hours passed as we laughed at our creations.  I hope you enjoy making the ornaments as much as we did.

Recipe

2 cups flour
1 cup salt
1 cup water

Mix with hands.  Knead on flat, unfloured surface.  No flour is needed on the kneading surface if the dough is of the right consistency.  If it sticks -- add more flour to the dough.  Roll dough out to 1/4" thick.  Use cookie cutters to make shapes.  Poke a hole in the dough to allow for a ribbon for hanging the final ornament.  Bake at 150 degrees Fahrenheit for 3-4 hours on a non-stick baking sheet. Turn ornaments over one time at about 2 hours.  Cool.  Ornaments are now ready to paint with acrylics.


Our dogs are represented in the fun.


Sunday, November 17, 2013

Backyard Chickens - Our First Egg!

 We went out to do the morning "farm chores" in our suburban backyard.  I was checking on my chicken's feed and water when I saw it.  There, in a straw-filled nesting box sat a perfectly-shaped small brown egg.  Our first egg.  I was so happy to see that one of my little pullets had gone through this rite of passage.

Since I had only two hens in the outdoor coop since Mary's injury -- the owner to this egg had to be either Queen Mary or Lady Edith.  I asked them both.  They were too dignified to answer such a personal question over their morning scratch grains. 


So, who do you think laid the first egg?  Are you team Mary or team Edith?

Sunday, October 27, 2013

Chicken Injury Update: Queen Mary on the Mend


When our top hen Mary had her eye injured we first put her in a dog crate in our home to serve as a chicken hospital.  This seemed like the rational next step.  However, I now understand that far before the chicken hospital I had begun to gently slip from the world of rational behavior. Yes.  I had developed chicken-caregiver neurosis. 

The symptoms started small.  I just wanted to build a cute coop.  But, then it proceeded into conversations I started having with my pullets.  "Why yes, Edith.  You do have lovely feathers.  Don't listen to Daisy."  Those passing by would overhear the one-sided conversations.  It was reminiscent of those humble souls on the subway who have moved from the world of neurosis to psychosis.  However, I maintained that my feet remained firmly on the ground.  I wasn't living in the great chicken coop in the sky -- just dreaming of it.

But, Mary's chicken injury has brought about a whole new level of neurotic manifestations.  I could no longer deny my condition.  My husband came home to finding me sobbing on the back porch with Mary wrapped in a baby blanket that I had used when my daughter was an infant.  He knew what I needed.  He brought me Kleenex and told me what a wonderful bird Mary was.  He even showed patience as I slept in a cot near Mary for the next several nights.

When the vet informed me that Mary was blind in her right eye -- the crocodile tears turned into ugly crying.  A passing vet and assistant came out to comfort me.  The vet softly said, "chickens are under-rated as pets."  I blurted out, "I know!  I raise chickens because I love chickens -- I don't even like eggs!"

Sigh.

Mary now appears healthy with the exception of being blind in one eye.  We will do a final check-up to rule out the need of surgery this week.  However, she still lives in our home as we are having issues reintegrating her into her brood.  When we took her to free-range the remaining three pullets chased and pecked at her.  So, at the last vet appointment (where I proudly didn't shed a single tear) I asked the vet how to work through issues of the remaining chickens seeking to injure Mary.  (For those unfamiliar with the pecking order, chickens can be brutal to injured hens or pullets.  Sometimes they will even kill the injured bird.)

My vet recommended removing another chicken out of the brood to be with Mary in the house.  "To have a friend?" I sincerely asked.  The look the vet gave me for my question confirmed that I still live in a chicken dream world.  "No," he answered.  He went to explain that removing a healthy (but not top or aggressive) bird will disorient the remaining birds.  So, when Mary comes back to the brood, all of the aggressive attention will not be focused just on her.

So, we removed Edith.  Edith had been a particularly sweet hen until Mary's injury.  After Mary's injury, even she began to chase and peck at Mary.  However, once we separated Edith from the group the two hens are now snuggling with each other at night and there is no unusual aggression between these two birds.

Yes.  You heard right. I now have two chickens living in my home.  I had to purchase something bigger than the dog-crate which fit only one.  I now have them both in a Graco play pen.  When I take them to free-range outside, the other hens now chase both chickens.  Jessie tends to chase Mary.  Daisy tends to chase Edith.  I will continue to work on building the relationships between my chickens. 

Chicken brutality is something I don't like to focus on.  They live based on instinct and survival.  There is a safety in the pecking order. 

Although Queen Mary appears to be healing fine, it may take me a while to work through my own neurosis.  Instead of focusing my attention on the realities of chicken pecking order, I'm going to go back to my happy chicken place by finding stylish (yet functional!) chicken diaper patterns.  Until my brood is once again peaceably united, I'm sure I can find some cute fabric to accentuate both Edith's and Mary's lovely feathers.

Sunday, October 6, 2013

Our First Chicken Injury


We scarcely know how much of our pleasure and interest in life comes to us through our eyes until we have to do without them; and part of that pleasure is that the eyes can choose where to look.  But the ears can't choose where to listen.       -- Ursula K. Le Guin 

Last Friday I learned that our hen Lady Mary is now blind in her right eye.  Chickens see different distances from each eye.  So, she has been limited in her overall ability to see. 

What happened?

I assumed she had debris in her eye from dust-bathing on a particularly windy day.  But, hens are good at hiding injuries and illness.  It's a skill called masking.  It helps them not appear weak for any predators who might want chicken for dinner.  However, based on the extent of the eye damage, our avian veterinarian indicated it was more likely a puncture wound from being pecked or clawed by one of the other hens.  Although we had been providing her with antibiotic drops from our general vet -- we were unable to save her sight.  We are still determining whether or not eye surgery is needed to remove the damaged eye.

What next?

Until next Friday, we continue to treat her eye with steroid and antibiotic drops.  She's been in a dog crate recovering in our home.  We have supervised free-range time to try to keep her brood remembering who she is.  Meanwhile, we have to watch out for the hens who want to peck at her injuries. 

We'll keep you updated on how our Mary is doing.  We told her she has now been promoted to the title of Queen.  She is an amazing little bird.

Sunday, September 29, 2013

Make a Wish


If you are a dreamer, come in.
If you are a dreamer, a wisher, a liar, a hoper, a prayer, a magic-bean-buyer.
If you're a pretender, come sit by my fire, for we have some flax-golden tales to spin.
Come in!  Come in!
-- Shel Silverstein
 
I am a wisher.  I wish on an assortment of items ranging from the first star of the evening to fallen eyelashes.  I've blown my share birthday candles and dandelion seeds -- both with reckless abandon.  I don't even worry about the extra years or the resulting yellow flowers. 
 
I contemplate what I would do if a magic fish arrived at my house to grant me three wishes.   Whether my wishes come from a flamboyant blond genie or a fish, I need to be prepared.  I avoid wishing on monkeys' paws, though.  That's just common sense.  I do believe a touch a pragmatism to be helpful from time to time.
 
I believe in two kinds of magic:  good and bad.  The bad kind of magic compels me to jump over sidewalk cracks, avoid walking under ladders, or spilling salt.  The good kind of magic turns caterpillars into butterflies or a seed into a flower faster than I can say bippity-boppity-boo!
 
I believe in luck.  The kind of luck that sends me searching the meadows for a four-leaf clover.  (Tearing the leaf of a three-leaf clover to make it look sort of like a four-leaf clover doesn't have the same results.  True story.)  Shiny pennies.  Tootsie roll wrappers with stars.  Fortune cookies. 
 
And I dream.  I unapologetically dream.   Come join me. 


Tuesday, September 17, 2013

From the Garden - Recipe for Tomato Basil Salad

I love cooking with fresh veggies from the garden.  So, I keep my eyes open for recipes that use ingredients that ripen at the same time.  This is one of my favorites from the summer garden.  My husband and I were at Aunt Dorise's and Uncle Don's house when we had his wonderful Tomato Basil salad.  This is one of those salads where you can alter the quantity of ingredients to your own personal taste.  But, I've worked to put some portions together as a starting point.
  • 2 cups vine-ripened tomatoes (in one or multiple varieties).  Half the cherry or grape tomatoes, slice/chop larger tomatoes into bite-sized pieces.
  • 1 peeled cucumber either thinly sliced or diced (if you do not have cucumber on hand, this ingredient can be left out). 
  • 6-8 freshly chopped basil leaves
  • 1/2 red onion cut into thin slices
  • 1/4 cup feta cheese; crumbled
  • 1/4 cup virgin olive oil
  • 3 TBSP balsamic vinegar
  • 1 TBSP sea salt
  • 2 tsp. freshly ground pepper
Place cut tomatoes with their juice into a bowl.  Add sliced cucumber, onion, basil, and feta.  Drizzle olive oil and balsamic vinegar.  Salt and pepper to taste.  Refrigerate until ready to serve.

This is a salad that tastes best when it is made fresh before eating.  It loses some of the crispness of the cucumber and onion if it sits in the oil and vinegar too long.  If you do want to make the salad early, combine all the ingredients except the vinegar and oil.   The oil and vinegar should  be added just before serving.

Friday, September 6, 2013

Slowing Down and Sustainability

I work as a paralegal in a fast-paced law firm.  There are never enough hours in a day to accomplish everything on my to-do list.  I'm one of those folks who needs the reminder that we are human beings, not human doings.  Sometimes the most important thing I can do is be still.  This week the universe  decided to slow me down.  Again.  I've spent the last two days home sick. 

Instead of billing hours for the firm, yesterday I visited the doctor, watched my chickens free range, pet my dogs, annoyed my teenage daughter (not hard to do), took several naps, looked at the garden my husband's been tending, hugged my sweetheart, and watched the stars.  The world is a beautiful place.  I still woke up sick the next day.  But, it was nice to slow down.
 
I think there is a lesson in here for me.  I need to slow down before I get sick.  I need to take more summer walks and take less work home.  That being said, I'll be working this weekend to make up the lost hours.  But, the billed hours will softened by some herbal tea on the back porch, quiet time in nature, and time with my beloved.  Maybe by finding balance I can actually prevent some of the illnesses I've been fighting.  I think that living a balanced life may be yet another form of sustainable living. 

Wednesday, August 28, 2013

Hey Sunflower Girl!


Seven years ago I was finishing up divorce documents.  My attorney told me that if I wanted to legally change my name, we could include my name change with my papers.  "So," I asked him, "I can change my name back to my maiden name?"  He laughed and said, "you can change your name to whatever you want." 

Whatever I want.  I liked the sound of that.  I was starting a new chapter in my life and a new name seemed like a good way to start.  What name fit who I was now?

I came up with the name Sunflower. 

I live in the beautiful desert of Utah.  It is hot here in the summers.  Uncomfortably hot.  The soil where I live is actually rock with a little bit of sand.  We have long periods of drought. Water is rationed every summer.  Yet, in these adverse conditions, these beautiful sunflowers dot the landscape.  They can blossom in these conditions because they have roots that go down deep and seek for water.  Yes.  I had been through my emotional desert and had the strong roots of friends, family, spirituality, and a sense of self that allowed me to flourish in adverse conditions.  Sunflower it was.  Until I spoke with my sister.

"Don'tcha think that changing your name to Sunflower might hurt Mom and Dad's feelings?"  Oh yeah.  History.  Heritage.  Not to mention that I actually like the name they chose.   I didn't change my name to Sunflower.  But I let the wild sunflower seeds bloom in my yard along with a few hybrid varieties.

A couple of years after my divorce I began dating my current husband.  He sent a bouquet of sunflowers to my office.  He's a keeper.


Wednesday, August 14, 2013

Home-Canning: The Best Salsa Recipe Ever

My husband is a treat hoarder.  He can be seen around the house with a box of cookies or bag of Doritos that he hid away from the rest of the family.  One year I gave out jars of my homemade salsa to friends for Christmas.  That's the year he also became a salsa hoarder.  He's okay if I give away homemade jams or jellies, but was dismayed at losing a single jar of salsa.  He's taken to hiding his personal stash.  Yes.  This recipe is just that good.

This salsa recipe came from my mother's friend Eva to my mom.  My mom taught me to write the name of the friend who gave the recipe on the top corner of the recipe card.  That way, each time I cooked the recipe I could have nice thoughts about that friend.  So, today I thought about Eva, and my mother, and I made a half batch of the best salsa ever.


This recipe is great for the summer garden.  It takes only a few ingredients.
  • 1/2 bushel (about 26.5 pounds) skinned and chopped tomatoes 
  • 3/4 to 1 cup of canning salt
  • 1 cup sugar
  • 1 cup vinegar (white or apple cider)
  • 5 large yellow onions
  • 5 large bell peppers
  • 20-27 small or 10-12 large jalapeño peppers
Makes 14+ pints of salsa

Step 1:  Skinning tomatoes
Wash the tomatoes.  Discard any with significant scarring or other blemishes.  Your salsa's only as good as your ingredients.  So, if you don't garden, you may want to go to a Farmer's market or store that offers vine-ripened tomatoes.  To skin tomatoes, you'll use two pots.  One is filled with ice water and the other is on the stove full of water heated to a rolling boil.  With a large slotted spoon, place six tomatoes into the boiling water.  As soon as they are in the water, you'll want to work just as quickly at removing them.  In the order they were placed, spoon the tomatoes out of the boiling water and place them into the container of ice water.  Repeat until the ice water bowl is full.  Take the iced tomatoes out and with a paring knife cut off the stem end.  Cut the tomato in half.  With the knife, the peel should easily pull off the tomato half.  I then cut the half into half and into small pieces and place them in a colander to drain.

Step 2:  Thicken salsa
Place drained tomatoes, canning salt, sugar, and vinegar into a non-reactive (enameled) large roasting pan.  I put the roasting pan across two burners, with both burners on low to medium heat. 

Step 3:  Prepare the onions and peppers
For this recipe you will be working with a large quantity of spicy ingredients.  You probably know your tolerance for working with spicy peppers or onions.  If you have any cuts on your hands or are prone to rubbing your eyes, you may want to wear rubber gloves when working with these ingredients.  I have a friend who uses goggles when cutting large quantities.  I haven't splurged on the goggles, yet.  Instead, I do a little cathartic crying during the onion cutting. 

Prepare vegetables for grinding.  Remove onion ends and peeling.  Remove stems from green peppers and jalapeños.  Grind the onions and peppers.  (I use a Vitamix blender.  However, a food process, hand grinder, or even finely chopping the ingredients work well.)

Note:  The jalapeño peppers are what add the spiciness to this salsa.  You may want to add less peppers than listed and then taste the salsa before adding more. 

Step 4:  Continue to thicken salsa
Add the onion and pepper mixture to the tomato mixture on the stove.  Continue to slowly cook the mixture until it is to the desired consistency.  Stir occasionally.  


Step 5:  Prepare canning supplies
Wash canning lids and rings.  Place them in sets in a pot of water placed on low heat.  Keep at a simmer.  Wash canning jars and place them in an oven set at 150 degrees.  Fill water bath canner halfway with water; bring to a boil.  Fill tea kettle with water, set to boil. 

Step 6:  Fill jars
Using a funnel, fill heating canning jar with heated salsa.  Leave 1/4" head space between top of glass jar and salsa.  Slide plastic knife down inside of jar to remove air bubbles.  Wipe off jar top.  Take jar ring and lid from simmering water and hand tighten on jar.  Place jar in wire rack placed in up position in canner.  When canner is filled (no jars touching) lower jars into boiling water.  Cover jars with 1-2 inches of water.  To speed process, I add the boiling water from tea kettle. 

Step 7:  Process salsa
Bring water bath canner to boil with lid on.  Once water is at a rolling boil begin timing.  Salsa takes 15 minutes to process at low altitude.  However, additional time is needed for the salsa to be processed depending on the altitude you are at.   For example, in my location in Utah, I need to add 10 minutes, and will process/boil the salsa for 25 minutes.

Step 8:  Sealing jars
Once time is completed for canning, carefully remove the jars from the canner.  (Point the canner's lid away from you so you don't get burned by the steam.)  With your jar holder remove the jars and place on a heat resistant surface.  Leave space between the jars.  You will hear the jars pop as they seal.


Wednesday, August 7, 2013

Shopping Finds for the Hipster Chicken Keeper


Recently the online media has focused attention on hipster chicken keepers.  Whether blaming the plight of homeless chickens on the backyard chicken keeping trend, or NPR's defending the chicken keepers and blaming community rooster regulations -- being an urban or suburban chicken keeper has now come with a label.  Since I am a suburban chicken keeper, I have now also become a trendy hipster.  (Well, I do like shopping at vintage stores, and have a thing for mason jars.)  I figure instead of refuting or defending the label -- I decided to acknowledge it exists.  In my case, I can see how it may even be a wee bit warranted in that I love the new chicken accessories popping up.  Just like most of my interests, there's shopping to be done.   Here are a few of my favorite finds.
 

Ceramic Egg Cartons $12 from Anthropologie.  They stack, come in cute colors, and can be safely cleaned and reused.  Want!
  
William Sonomas's Egg Run Holder will keep your fresh eggs arranged by age.  Brilliant!  $29.95


Nothing says, I'm a modern hipster chicken keeper like the Egg Hanging Planter from Urban Outfitters.  With its retro feel, you can call your friends over for a Mad Men party and serve up some deviled eggs with this beauty hanging in the background.  (As you all probably know, it's those wicked chickens who lay deviled eggs.)  $34.


Chicken keeping can also be an excuse to buy shoes.  Although my closest feedstore has some practical rubber boots, you should see the selection at Nordstroms.  I resisted showing you the studded Valentinos which even I couldn't imagine wearing to the coop.  Instead, here's a flowered pair that are just calling to be worn while pushing the tractor coop to another section of the yard.  For $69.95 you can purchase the 'Margo' boot.


For those real splurges for $3,300 at Sundance Catalog, you can purchase this 30" x 30" painting "Morning View" by artist and sustainable living author Katherine Dunn.


Saturday, July 27, 2013

Chicken fan mail!?

Well, there's a first for everything.  I picked up the morning mail to find a letter addressed "To our Grandchickens."  Besides a good laugh, what did Grandma Hen send her grandchicks?  The latest news in chicken fashions, of course.  Alas.  We have nudist chickens who take free range to a whole new level!

Feel free to keep the chicken letters and comments coming.  Edith is quite the diva and told me she wasn't a bit surprised at receiving mail.

Friday, July 26, 2013

Recipes for the Summer Garden: Lidia's Basil, Parsley, and Pistachio Pesto


Fresh basil and pesto from the garden
"When are you going to harvest the basil?"  Nick's been asking me this for the past few weeks.  He's been carefully watering and weeding the garden in anticipation of a few home cooked meals. 
 
So, when I hear him talking Basil, I know he is wanting me to make Lidia's pesto.   (Click here for pesto recipe from Lidia's Italy.)

Although my family has always gone through a lot of sweet Basil, prior to this pesto recipe, I always had too much parsley in the garden.  Outside of the occasional garnish or a flavoring in my turkey gravy -- I really didn't use the plant very much.  Typically, I was giving away parsley from a single plant.  After finding this recipe, we now have four parsley plants, and I worry I won't have enough. 

There may be some pesto purists who will cringe when they read that Lidia substitutes pistachio nuts for pine nuts.  But, believe me, I cannot keep this version of pesto stocked. 

Summer garden dinners are the best!

Tuesday, July 23, 2013

DIY: Aging The Coop Shutters


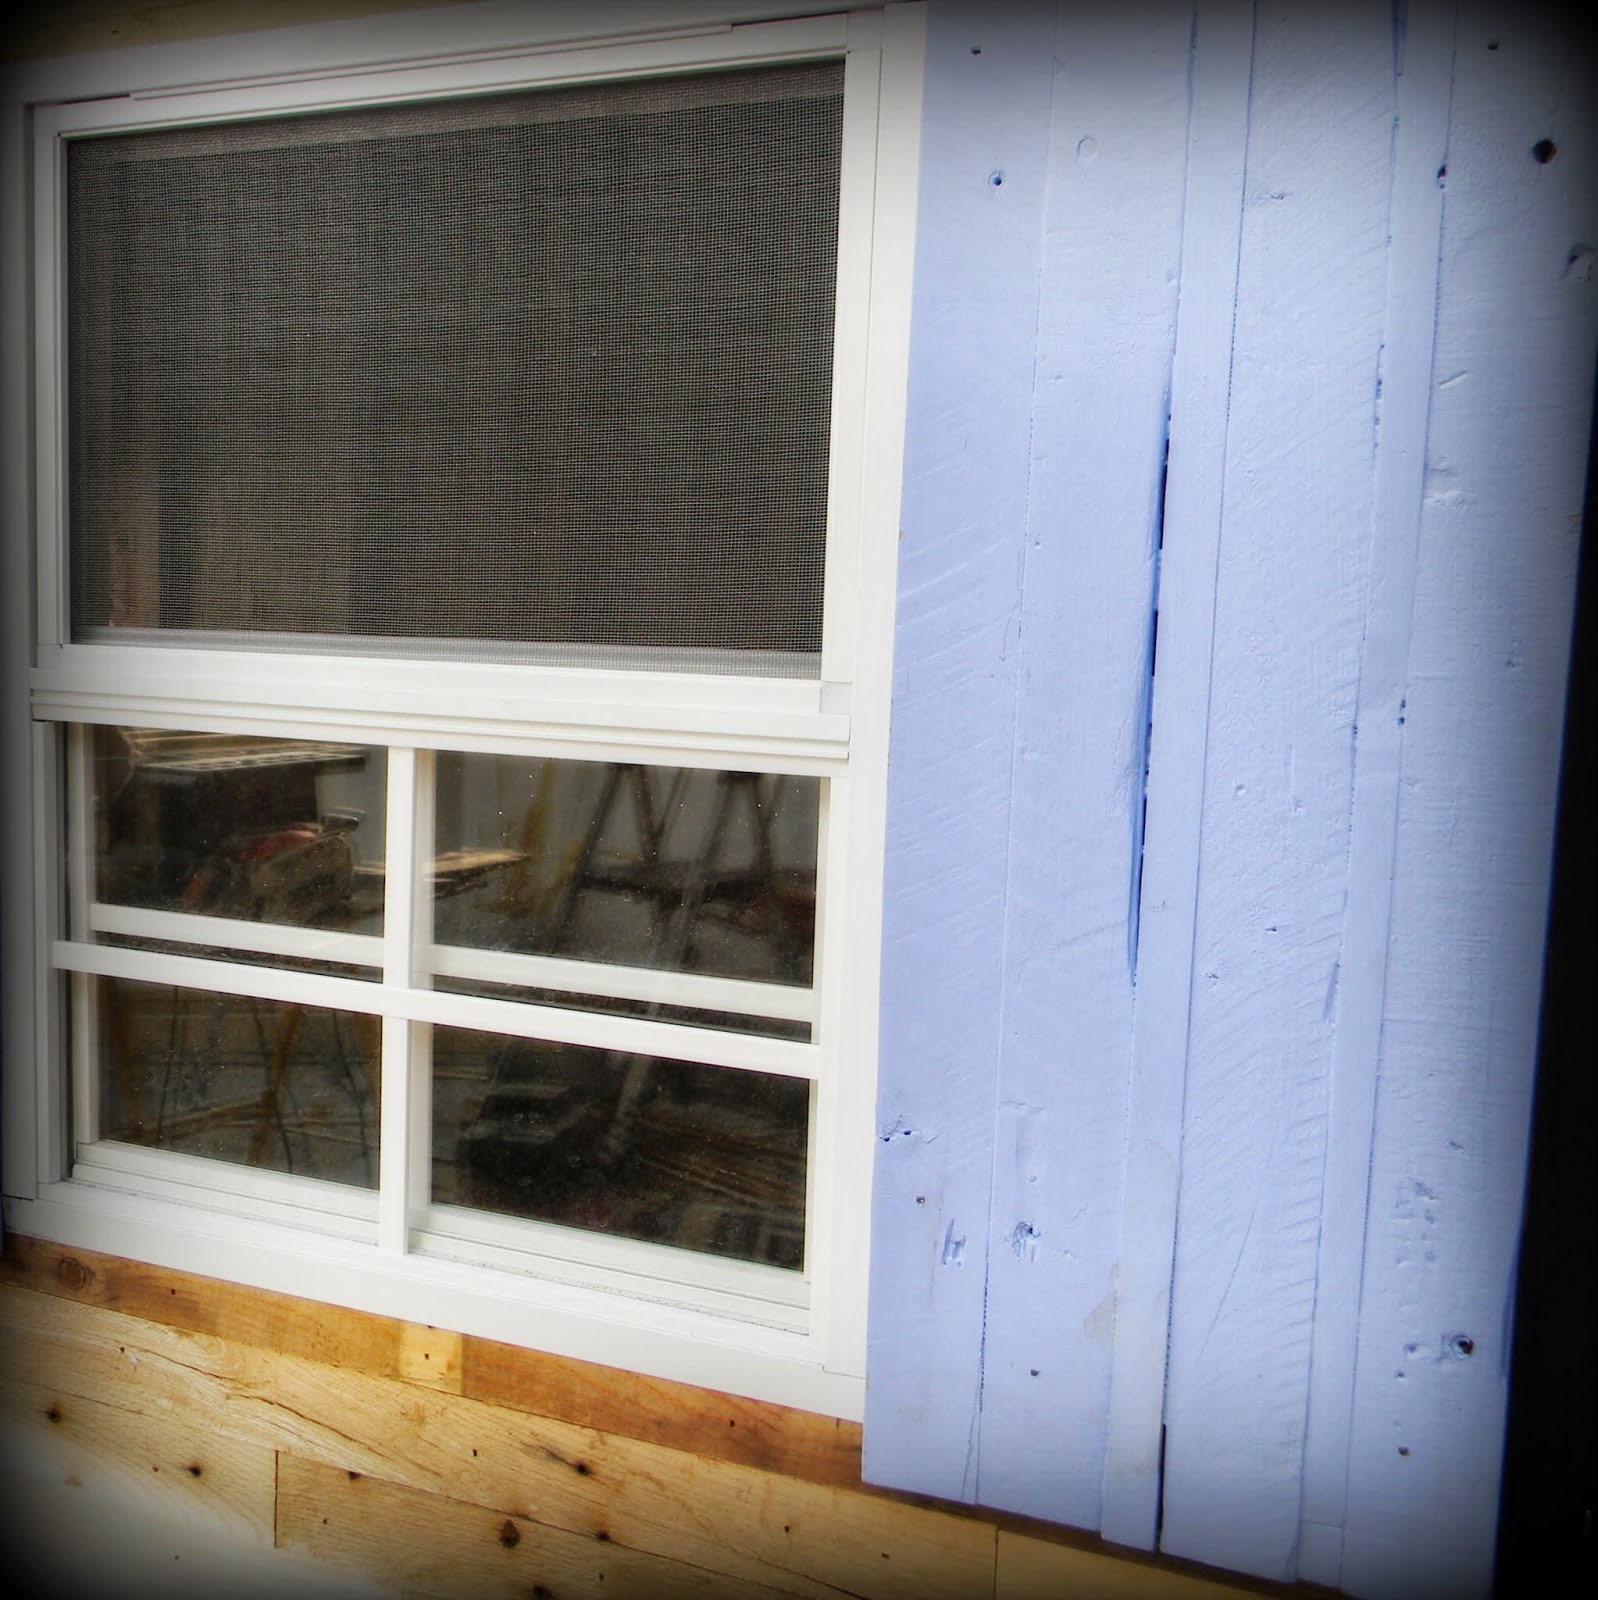
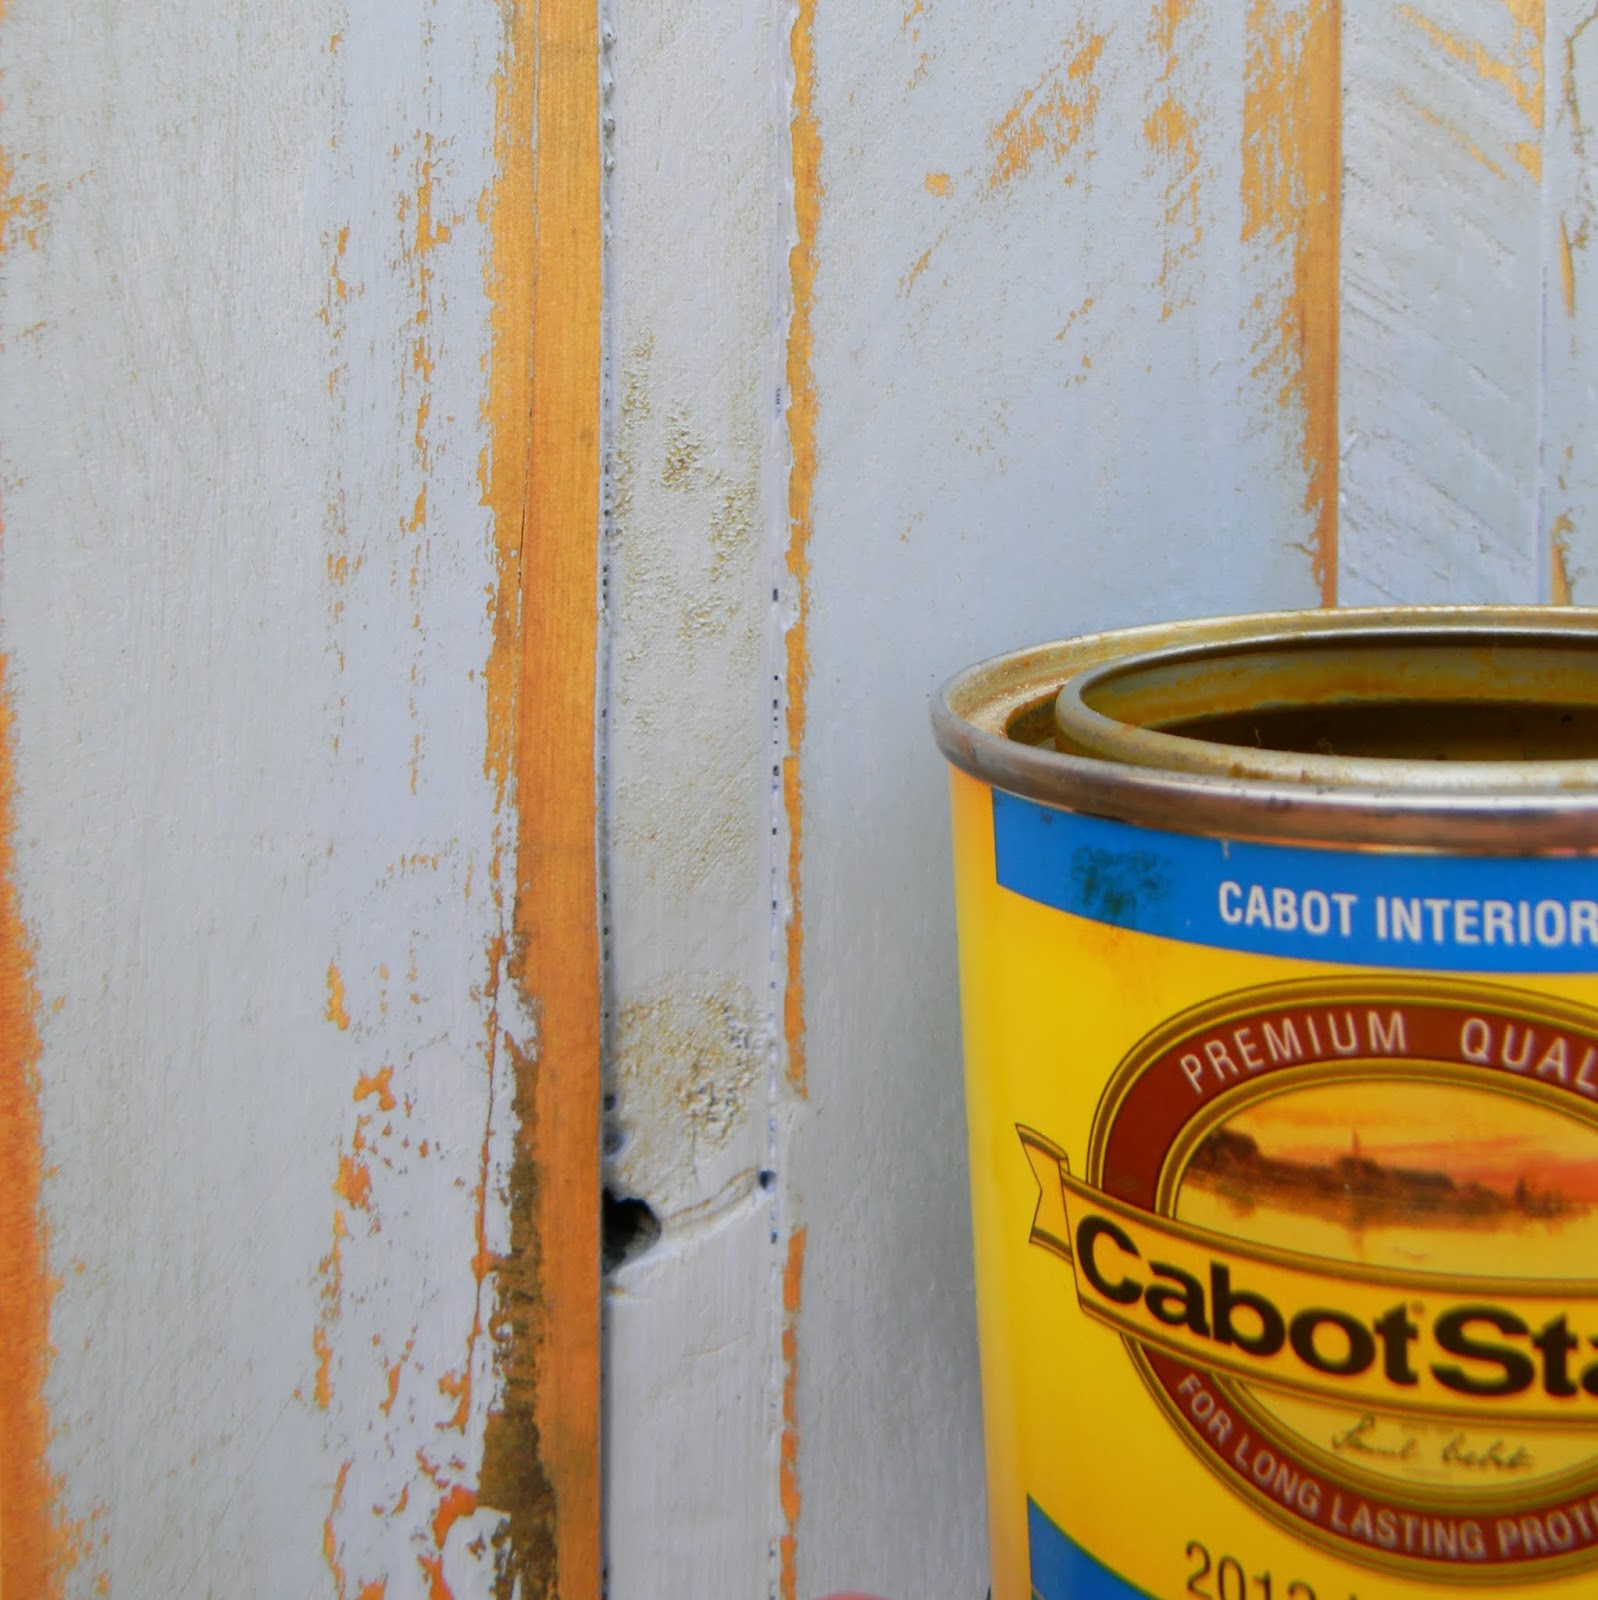
I wanted our coop to look like it had been out on the farm for years.  So it was time to distress some wood.  For those who haven't done it before, it's very easy.  The first step is to paint the wood in all of the colors you want to reveal.  In this picture, I painted the wood with both a white primer and a blue paint.  So, the reveal would have multiple colors.
 
 
In this photo,  I painted the shutters in just a blue all-in-one paint and primer so you can compare the effects of a single color.


The next step is to sand.  This is where the artistry comes in.  How weather worn do you want your project?  When I distressed furniture, I tend to be very light on the sanding.  I would hand sand areas that would naturally wear over time (such as the lip of a cupboard drawer or the edge of a table top.)  I didn't want the furniture to look abused, just worn.  But, for an outside coop, I wanted a lot of wear.  So, I took out a hand sander to take off a lot of paint.


I then add a stain over the sanded area.  It seals the final product, and further antiques my paint color.  The color is no longer vibrant, but looks like the sun has faded it over the years. 


The pups Jake and Sandy decided to check out the finished product and do a little of their own distressing at the same time.  Their goal was to distress the new chickens.  However, with the safety glass windows, Daisy doesn't seem a bit bothered by the visitors. 

Monday, July 22, 2013

Folk Singer Dar Williams on Protest Music

I grew up in a home surrounded by music.  Whether it was my older sister singing Italian opera at the piano, or my dad teaching us a simple folk melody while strumming his guitar -- music has always been a part of my life. 

Although I love most styles of music, I become nostalgic when I listen to folk music.  I was listening to a folk music program on our local public radio station when I first heard the music of singer-songwriter Dar Williams.  I felt an immediate connection to her songs. 

Her song topics range from the beautiful ballad on teaching our children love and then letting go in "The One Who Knows," to tackling the issue of obedience to authority, in the song "Buzzer" which relates the 1960s Stanford University Milgrim experiments to our society today. 

In the 1960s several musicians created protest songs to rally public opinion on social issues such as female empowerment in Aretha Franklin's song "Respect," James Brown's song "I'm Black and Proud," or folk singers Peter, Paul and Mary performing the anti-war song "Where Have All The Flowers Gone?"

Today, YES Magazine published the article, "Dar Williams: Why the Music of Protest is Still Worth Defending."  Do you agree with what she says happens if political music dies?

Tuesday, July 16, 2013

Chicken Coop Design Goal #1: Comfortable for Chickens


Framing the chicken coop
My husband and I love to work on building projects together.   We sketch, dream, and passionately debate the benefits or disadvantages of different building materials or design ideas.  We love to peruse salvaged building supplies looking for our next treasure.  He worked 15 years in the construction industry before becoming an architect student at The University of Utah.  Me?  I am highly trained at watching television design shows.  (I consider it my degree in HGTV.)
 
We wanted to build our own coop because we like the creative energy of building things and a smaller project like a chicken coop allows us to try out a few new design ideas.  Like most projects, Nick and I first determined what our design parameters were.  For this project, we had three main goals:
  1. The coop had to be comfortable for our chickens;
  2. The coop needed to be easy to clean; and,
  3. The coop had to fit our design aesthetic. 
Today's blog is about goal #1.  How to make a coop that's comfortable for our chickens. 

Flooring

The day we received our newborn chicks, the little birds were scratching and pecking at the brooder box.  They are now pullets, and they enjoy scratching everywhere they go.  They dig dirt bath areas, fluff up the pine shavings on the floor before napping, and scratch at the grass and bark for bugs and other food.  Scratching and pecking are natural activities for chickens.

For many commercial and even suburban flock owners, the floor of the coop is made of chicken wire.  The wire allows the bird droppings to remain off of the floor of the coop.  Having a wire floor on the coop can make it easier to clean.  However, this wire makes it difficult for the birds to scratch. 

Although ease of cleaning is also a design goal, our primary goal was chicken comfort.  So, we opted for having a coop floor without wire.  The chicken droppings will land on the pine shaving bedding.  This will create cleaning issues that we'll address in the next article.  But, we felt that this was a good trade-off in allowing chickens to be chickens.  Scratching and pecking are what they do.

Another consideration with flooring was texture.  We wanted to be cautious on not having a flooring material that was too slick for young birds.  We opted to pour concrete flooring.  The texture on the concrete provides enough traction that our birds do not slip.

Nesting boxes

It has been several decades since I have gathered eggs.  So, I'm less sure about nesting boxes.  What I've read indicates that several birds will use the same box.  So, with four hens I would likely need only 1-2 boxes.  However, we may wish to expand our little flock to six hens (the maximum allowed in my neighborhood).  So, we have three nesting boxes for good measure.

The size of many nesting boxes are 12"x12"x12".  However, if you have a smaller breed or larger breed of chicken you may want to adjust the box size.  My breeds are somewhat larger, so my boxes are 14" square.  I've read that if you make the boxes too large that two chickens may try to lay eggs in the same box at the same time.  This could lead to broken eggs. 

The nesting boxes are painted a darker shade of blue.  The boxes are not across from any windows.  The hens prefer to be in a dark, private place to lay their eggs.  The boxes will have straw bedding that the birds can use to form into a nest and I will place some sort of wooden egg or golf balls into the nesting area to teach my pullets the purpose of the nests.

I'm concerned that my nesting boxes are too close to the floor for the birds.  They will have a four-inch step up to the boxes.  I'll let you know if they have any issues with boxes that are this low to the ground.

Roosting Bars

Each hen needs about 18 inches of space where she will roost for the night.  The roosting bar needs to be set higher than the nesting boxes (to prevent the boxes from being used for sleeping).  The bar also needs to provide about 2 feet of head space.  There are some chicken owners who swear by round wooden dowels whereas others are loyal to 2x4 lumber for their bars.  I'll be using a branch from a fallen tree for one roosting bar and a 2x4 for the other.  I'll be experimenting with two bars at different heights to see what my breeds prefer.  The thickness and height of the bars will increase as my pullets age into hens.

Square footage

In 2012 the average US commercial laying hen only had 67 inches (yes inches!) of cage space.  (More information on industry practices from NPR. Click here to read.)  Although keeping the chickens in small cages may be a cost-effective approach to getting eggs to the dinner table, we wanted our chickens to have more opportunities to stretch, fly, roost, and nest. 

With the cold winters, we knew that our hens would prefer to remain indoors.   With too much space, the interior of the coop would have a hard time maintaining heat.  However, without enough space, the chickens would get anxious and would be prone to pecking at each other.  So, with industry standards being the minimum size, we read books and blogs to determine how large to make our coop.

We then had to balance a few things such as city ordinances  (which limited where the coop could be) and the size that would fit into our tiny suburban back yard.  Our coop has 27.5 feet of floor space, 5.5 feet of nesting space, and approximately 70 feet of outdoor run space.  When our four hens are full grown, this provides them with 990 square inches of floor space per hen and 3,672 square inches of total indoor and outdoor space.  This space is enclosed with chicken wire to allow the girls to remain safe while we are at work.  We also frequently let them out for free range time where they have access to our entire backyard when they can be supervised.

Close-up of Hens and Chicks and Ice plants on the coop's roof

Temperature Control

Even though I picked breeds of chickens that are cold tolerant, only two of my hens are heat tolerant.  Utah has extremes in heat, and chickens can go into stress when temperatures are too hot or too cold.  So we incorporated three ideas to help with temperature control for our birds.

  • Location, location, location.  Our hen's coop is located near our home where it receives shade from the north side of the house as well as shelter from the prevailing southern wind.  The run is covered, providing shade during the summer months and protection from snow and rain in the winter months.
  • Electricity.  We have wired the chickens home to have access to electricity.  This allows us to have a water heater keeping the chicken's water warm, as well as the ability to set up a heating unit for sudden drops in temperature.
  • Insulation.  Although many coops are not insulated, I worry about the chickens getting too hot or cold.  So, the walls have been insulated with foam.  The roof has insulation in the form of a living roof.  The roof has six inches of potting soil and is covered in plants.  This serves to help prevent the roof from getting too hot in the summer, and also serves to help maintain heat during the winter.

Venting

In a chicken coop, well, poop happens.  A lot of it.  It emits ammonia into the air which can cause respiratory problems for your chickens.  So, having an intake vent on the lower portion of one wall (for me, that is the door to our chicken run) and a vent near the top of the of the ceiling in the opposing wall should create air flow that removes the excess amounts of ammonia from the coop.  When placing vents, consider how to promote airflow without making the roosting areas drafty. 

Saturday, July 13, 2013

Pullets at Play


Lady Mary strutting her stuff during free range time

Week 5 backyard chicken keeping

The girls are no longer chicks - we're entering the world of pullets.  Like any teen, they are ready to stretch their wings and fly.  Cuddles with Mama hen (aka me) are less common than at week two. 
At one month old they had outgrown their brooder box.  They were ready to move into the new coop.  There was just one  problem, we hadn't finished building it yet!  I thought it would soothe their ruffled feathers to see our progress.   Instead of the cursory glances I expected, the girls immediately made themselves at home.  They happily chirped, scratched, and told us that they were ready.  Since I'm a pushover when they give me those cute little eyes, they moved in immediately, and we planned to complete the finishing touches during their free range time.

Here they are in their mostly finished coop enjoying their favorite treat - watermelon.  They are 5 weeks old in the video.

CLICK HERE to view video.


Monday, June 24, 2013

Two weeks and the chicks are so cute! (Video)

I was told that chicks were only cute for two weeks and then watch out!  But, I must have already bonded, because although my girls have passed the two-week mark, I think they are cuter than ever.  They are part down and part feather, and sweeter than I could imagine.  This week the girls decided that I was fun to perch on top of.  My arms and legs became roosting bars.  And if a strong wind gust or dog bark happened, they quickly ran under my sitting legs.  I think that officially makes me the Mama hen.

The girls have been practicing their flight skills with their new wing feathers.  Three of the four (Mary, Edith, and Daisy) will fly out of the brooder box when I remove the lid.  Jessie still waits for me to take her out.  It could be an excuse, though.  She prefers to be held and cuddled.  Mary gets these short bursts of energy where she sprints and flies hitting anything in her path.  They definitely have unique personalities.

I read that you can start giving chicken treats at this age.  We splurged on some dried worms.  (Yuck!)  I thought the girls would love it.  But, as you can see from the video, they were more interested in perching and catching some rays.  Free range time is its own treat.  Click here to see the video of the chicks with their first treats!

Saturday, June 22, 2013

Sneak peek! Chicken coop construction


Planting Hens and Chicks on the Chicken Coop's Living Roof
Our little chicks will soon outgrow their brooder box and will be ready for their new coop.  If only it were finished!  Here's a sneak peek at what we've done so far.